This is default featured slide 1 title

Go to Blogger edit html and find these sentences.Now replace these sentences with your own descriptions.

This is default featured slide 2 title

Go to Blogger edit html and find these sentences.Now replace these sentences with your own descriptions.

This is default featured slide 3 title

Go to Blogger edit html and find these sentences.Now replace these sentences with your own descriptions.

This is default featured slide 4 title

Go to Blogger edit html and find these sentences.Now replace these sentences with your own descriptions.

This is default featured slide 5 title

Go to Blogger edit html and find these sentences.Now replace these sentences with your own descriptions.

Thứ Ba, 31 tháng 5, 2016

5 Reasons Why Gmail is the best

Below you will find 5 reasons why Gmail is the best application.


1. Easily Create email

Gmail has made it easier than ever to compose email. Simply click the "Compose", and a small window will pop up at the bottom right of your screen. Because it is a separate window, you can browse through your email and take care of other tasks without losing your Gmail compose your email.

And Gmail automatically saves drafts your email. If you accidentally close your new email, you can start right from where you left off without having to retype the message from the beginning.

2. Call, Video Chat or Email


Forget having to use multiple programs to chat with friends and family. Gmail allows you to send emails, instant messages, phone calls and video chat with your contacts. And with Google Hangouts, you can hold virtual meetings for up to nine people right from your email. Share your screen, watching a video together or just chit chat. Gmail makes it easy to communicate the way you want, when you want.

3. Your Inbox - your way

Gmail offers you a multitude of organizational tools to customize your mailbox at your own way.


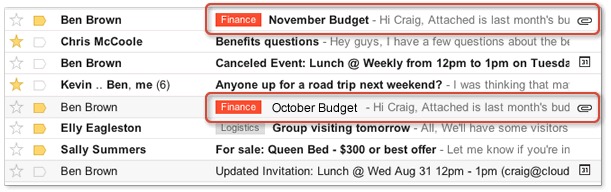
  • Create labels to quickly sort your messages. You can add more than one label per message, too. And the color of the labels make it easy to find what you want quickly.
  • You want to group together similar emails? Using filters. Simply set the standard for your filters, and Gmail will automatically filter and sort your messages.
  • Choose a theme for your email to give personality to your inbox.

4. Save time

With Gmail, you have lots of ways to make work your inbox for you, so you spend less time sorting through email and get things done time.


  • Snippets show you the first line of the email, so you can decide if it's urgent enough to open and read immediately.
  • The shortcut allows you to complete the task at lightning speed. There are dozens of keyboard shortcuts in Gmail, so you can start being more productive immediately.
  • Background sending allows you to send email without disrupting your current job.

No longer do you have to waste your time sorting through emails by hand.

5. Priority Inbox

One of the best features that Gmail offers its Priority Inbox. Every day, you're bombarded with messages from the stores you shop at and notifications from your social accounts. In the early days, the last thing you want to do is sort through emails and distracting nonsense.

Gmail splitting your inbox into three tabs: priorities, social and promotions. The first tab (priority) is where all your important messages are sent. The social tab contains all your social notifications, while the Ads tab contains the promotional emails from stores and businesses.

If you do not use Gmail, now is a great time to start. With easy way to sort, organize and compose email, it's no wonder the email system Gmail is favorite for millions of people around the world.

See more :  
How to automatically delete emails Old Spam in Gmail

Thứ Tư, 25 tháng 5, 2016

How to automatically delete emails Old Spam in Gmail


What would you do if you receive a lot of spam? The best way to clean up your inbox is to make it to Gmail automatically deleting old spam for you. And
Post below our will introduce you how to how to automatically delete old email in your Gmail cause of product. And then you never have to see this message if you do not want.
You must first log in to your Gmail.


How to automatically delete emails Old Spam in Gmail

There are a few different ways you can automatically delete old spam messages from your Gmail account.

Create a filter


Google warns that the filter can not work as intended when trying to send spam messages to the trash. But many people have had success with this method. Here's how to automatically delete your spam.

  • Click the gear on the right side of your inbox, and click Settings.
  • Click the Filters tab, and click the "Create a new filter" link.
  • A pop-up box will appear. In "These Words", enter "in: spam" without quotes.
  • Click "Create filter with this search," and then click okay to confirm.
  • Click "Clear It" to send spam to the Trash.
  • Click the check box next to the Create Filter button to apply this filter to any spam messages already in your spam folder.
  • Click Create Filter.

This will remove any old junk mail you have in your folders, and automatically remove any spam you receive in the future.

Wait 30 days

If you do not want to create a filter or filtration methods are not 'working for you, you always have the option to just ignore your Spam folder for 30 days. Gmail automatically delete spam messages after 30 days, so you do not need to delete them manually.

Google recommends simply wait for Gmail to automatically delete your old messages for you. Filters can be a hit or miss, so if you're not in a hurry to remove from your Spam folder, you can wait a month for the message to disappear on their own .

Use the "Delete All" feature (not automatically)

Is there a way to get rid of all your junk mail, but this is not an automatic method (techniques).

When you click on your Spam folder, you'll see a notification at the top of your inbox. Inside of that message is a handy link will delete all your spam with just one button press. It may not be an automated way to get rid of spam in your inbox, but it's a quick way to delete these messages if you do not want to wait 30 days or masking technique is not made work for you.

If your inbox is filled with spam and you can skip your folders in a few weeks, it is best to let Gmail automatically remove junk mail for you. But if you need to get rid of spam today, one of the two methods will solve your problem

See more  :  


Thứ Sáu, 20 tháng 5, 2016

How to delete name on Gmail Sign-in page from previous login

Google has introduced a new unified login page for all Google services. Irrespective of which Google services you log on as Gmail, Youtube -. It will redirect you to the new Google login page account of how one is my login name, profile photo, email & ID is visible on the Gmail Sign-In page even after I had logged out ? This has puzzled and worried many users Gmail when many users do not want to see the email ID, profile picture and record their name after signing out of your Gmail account and sign in to your Gmail account or other Google.
Disable 'auto login' to fix the problem logging in to Gmail
This problem is a result of "automatic login" feature is enabled by default whenever you log in to Gmail or Google account. Gmail login details / your previous Google will appear on the login page after logging out as seen in the image below.


1. Open Gmail or Google account login page url accounts.google.com. Enter your email username and password on the login page.


2. Uncheck the option Stay logged (no mark beside this option). Then click the Login button to large logging into your account. After the sign you will see the same login page but no detailed account of your previous login name, profile picture and email ID.


3. If you do not uncheck the "stay logged in" option, the login details will appear on your previous Google Account login page. You can also manually remove it by clicking on the "sign in with another account" at the bottom. Then click Remove button, click the X next to the account are listed and finally click the button done.

See more  :   

Thứ Năm, 19 tháng 5, 2016

How to Block Email address through Gmail


On each day you encounter any spam email, then you feel the trial, you feel cluttered inbox view by the mailbox that sense. Actually it is very simple so you can easy to ignore and delete it go too, there are some cases when it's better to simply block the sender to stop the emails from landing in your inbox you.

If you're using Gmail, you may be surprised to find that there is no real way to "block" email address. Your only option is to send email from that person to your junk mail box automatically. Fortunately, Gmail makes it easy to . Here we will introduce to you how to block email address through Gmail.

How to lock an Email Address via Gmail


To block an email on Gmail, follow the steps below:


  1. Log into your Gmail account.
  2. Open an email from the sender you wish to block. If you have a lot of emails in your inbox, you can use the search box at the top of the page to search for the person’s name.
  3. Once the email is open, click on the down arrow on the top right side of the message (next to the quick reply button).
  4. Select “Block (Sender’s Name)” from the dropdown list.
  5. Gmail will ask you to confirm the action. Click the Block button to continue. You’ll notice that the dialog box says all incoming emails from that sender will automatically be moved to your Spam folder.


Now, each time being in breach'll send you an email, it will automatically be moved to the Spam folder. This way, your inbox can never be filled with unwanted email. When you're ready to get rid of these emails, simply empty the Spam folder.

Email addresses are not blocked

What happens if you block an email, and then regret your decision? Gmail makes it easy to unblock users, too. Here's how:

  1. Log into your Gmail account.
  2. Click the gear icon in the upper right of your inbox.
  3. Select Settings from the drop-down menu.
  4. Click "Filters and Blacklists" tab.
  5. Locate the sender wants to unlock, and click "unblock" link.


Mark messages as spam or phishing

Gmail do our best to filter out incoming spam, but some messages will be passed over time. That is why Google has made it easy for Gmail users to mark messages as spam. Therefore, it also helps Google improve its algorithm and block similar messages in the future from landing in your inbox.

Here's how to mark messages as spam:

  • Log into your Gmail account.
  • Select the message from the sender violations.

Now, there are two ways to mark a message as spam
  1. Click the down arrow on the right side of the email (besides the quick reply button). Select the "Report Spam."
  2. Click the "Report Spam" at the top. Find button with an exclamation point in the middle of a stop sign.

Also, if you receive an email requesting your personal information, you can report the sender to fraud and helps Google identify similar email.

To report a message:

  • Log into your Gmail account.
  • Select the message from the sender violations.
  • Click the down arrow on the right side of the email (besides the quick reply button). Select "Report phishing."

Block email from shopping sites, social networks and similar sites

If you receive unwanted advertising messages and similar messages, you can block future emails from entering your inbox by unsubscribing from the email list.

To do this:

  • Log into your Gmail account.
  • Open the offending email.
  • Click on the "Unsubscribe".

Without the "unsubscribe" link, finding a link "Change Preferences" to remove themselves from the list. If neither of these options are available, you can block the email address using one of the methods listed above.


Thứ Năm, 12 tháng 5, 2016

How to forward email in Gmail


Although Gmail is a great free service of email, but at a certain time that you want to forward the message to another account. For example, if you want to move all messages from your Gmail account to your new email address automatically. Here we will introduce to you how to turn your Gmail inbox into another mailbox.

Forward all email from Gmail


If you want to forward all emails from Gmail, here are steps to guide you forward, and you need to follow it. Note that Gmail will not notice that it is automatically forwarded message is spam, so you may still need to check your account from time to time, in case there are some important messages not be sent to your new email address.

Step 1 Enter email forwarding address

If you just want to send all of your messages from Gmail to another email account, you can do this easily. Go to your Gmail Inbox using a web browser and click on the icon at the top Cog right of the page, then click Settings. Click the Forwarding and POP tab / IMAP and click Add a forwarding email address. Enter the address you want to send all e-mail and click Continue, then click Continue again.


Step 2: Enter the verification code
At that Gmail will automatically send you a confirmation email to the email address that you specify forwarding, so you will need to check this address to your message. When you have it, you can click on the link in the email to automatically verify your email, or you can copy and paste it into the box in Gmail, Settings, Forwarding and POP page / IMAP. Once you've verified your account, you're ready to configure the relay.


Step 3: Transition Configuration

Once you've verified your account, Gmail will not automatically forward emails; instead, you need to tell it how to work forward. Go to the settings page of your Gmail account and return to the tab Forwarding and POP / IMAP. Now you can select the 'Forward a copy of incoming mail to <email address to verify your>'. You also need to work out what to do with that email came into your Gmail account. The default is to keep the message, but you can choose to delete, archive, or mark it as read. Click Save Changes at the bottom of the page when you're done and your email will start to be forwarded.


STEP 4 : Disable forwarding

If you no longer want to forward của emails, go back to the settings page and select Disable forwarding. Click Save Changes to confirm the change. You can remove của am also forwarding email address verified. Use the drop-down menu after "Forward a copy of incoming mail to 'to select the Remove option for your email. Click OK to confirm the change.


Forward specific email from Gmail

If you just want to send specific emails from your Gmail account to an email address, here are the instructions you need to follow. All e-mail that does not conform to the rules will be for you to configure your Gmail inbox. You will need to have created a forwarding email address, by following the steps below.

Step 1 Create a filter

Once you've verified your email address (as above), you can go to Settings (click the icon Cog), the Forwarding and POP / IMAP. Click the link to create a filter in the Forward and you will get a dialog box to fill, which will search emails matching your criteria. This can include messages from, it was, subject, word in itself, plus view attachments and the size of the message. Once you have filled in the data, you can click the Search button to verify the email list that you want to be forwarded. Click Add, Create Filter and you can modify the search results, or you can click Create filter with this search to sort out forwards.


STEP 2 Select forwarding address

In the Create Filter dialog box, put a tick in the Forward it to box and, from the drop-down menu, select the verified address that you want to send matching messages to. Click Create Filter and the new rule will be created: when you get an email that matches your search criteria, they’ll be sent automatically to the email address that you selected.


STEP 3 Disable filter
If you no longer need your rule, or you need to edit it, go to Settings and click on the Filters tab. This will display a list of all of your filters. To make a change click Edit, and you can change the search criteria and, after you click Continue, what to do when the rules are matched, such as changing who the messages are sent to. If you’d rather delete the filter, just click the Delete link and click OK in the next dialog box.


SEe more :   
How to Download and Install Apps Gmail and Google Calendar on your iPhone

Thứ Ba, 10 tháng 5, 2016

How to Download and Install Apps Gmail and Google Calendar on your iPhone

Below you will find our article show you about the download on your phone.

If you're used to using Gmail and Google Calendar app on your Android device, or even Gmail or Google Calendar in your browser, you may want to install the official Gmail app and the official Google Calendar app are available in the App Store.


Once you’ve installed and opened the Gmail app, you should see an Accounts screen with a list of the Google accounts available on your phone (if any). Tap the slider button to the right of the Google account you want to add to the Gmail app. The slider button turns blue.


If you don’t see the Google account you want, you can add it to the Gmail app manually by tapping “Add account”.


Enter your Gmail email address and password when prompted. Then, the following screen displays telling you that the Gmail app wants to send you notifications when you receive new emails. If you want to receive notifications from the Gmail app, tap “OK” on the dialog. Otherwise, tap “Don’t Allow”.


The first time you open the Gmail app, it wants to tell you about its various features in a tour. If you want to skip the tour and go straight to the app, tap “Go to inbox” in the bottom-left corner of the screen.


The email messages in your inbox for the Gmail account you added (or enabled) displays. Your Gmail account is added to the Gmail app as an IMAP account, which means that any changes you make to your account on your phone is synced with your Gmail account. So, any actions you take, such as messages you receive, messages you file under labels or delete, or messages you send on your phone, are recorded in your Gmail account and you’ll see those changes the next time you log into your Gmail account in a browser or in the Gmail app on another device.


To add other Google accounts you’ve added to your phone to the Gmail app, tap the menu button in the upper-left corner of the screen to access the menu panel. Then, tap the email address at the top of the menu panel.


At the bottom of the menu panel, tap “Manage accounts”.


Tap the slider buttons for any Gmail accounts you want to access in the Gmail app. The slider buttons turn blue for any accounts you activate.


The Google Calendar app is set up in a similar way to the Gmail app. Simply select the Google accounts you want to sync to your phone or add a new account. You can select different ways to view your calendar entries using the menu in the upper-left corner of the screen.


Google also has an app called Inbox that helps you keep your email organized. Some of the features of Inbox include bundling similar messages together, adding reminders to emails you need to get back to, and snoozing emails and reminders until you’re ready to deal with them. There are many other Google apps for iPhone, such as Google Maps, Google Drive, and Google Docs, Sheets, and Slides.

See more :  


Thứ Sáu, 6 tháng 5, 2016

Get the Emails sent in Gmail, sent emails to cancel gmail

Get the Emails sent or cancellation sent emails is one of the features that are built on Gmail. But if to use it, users must enable it to use. This article we will guide you to turn this useful feature in Gmail, please refer to our article below.

Aimed towards the user engagement and better serve our users has continued referring to the tips Email, in the previous article we show you how to get your Gmail password this article we guide how to regain your Gmail Emails sent.


Gmail is one of the Web-based email service best today, that is why it is more popular to help. Every day, thousands of submissions and receive emails on Gmail serves for work and study. With the "Undo Send", Gmail allows users to retrieve Gmail Emails sent during certain periods when they are errors in the implementation process.

Emails sent to recover in Gmail, cancel Email sent

REQUEST:
- Gmail account. If not, you can register yourself an account to use later, Gmail registration process takes place quickly and not very complicated after the registration is complete you can use Google services such as Google +, Google Maps, Google Drive ...
- Web Browser: Using the web browser is famous as Firefox, or Google Chrome CocCoc ... now we have updated to the latest version of the browser, if you do not have either version here already you can dowload the older and use

 STEP 1: Sign gmail -> select the right set Gmail account
In the tool settings gmail, select the gear icon (1) => select Settings - Set (2)


STEP 2: A pop-up window, you select the Labs (3)
In the search box for a lab: Enter the Undo feature Send- Unsubmit (4) => Select Enable (5) (Enable retrieve emails in gmail) => Then click Save Changes - Save settings (6 ) to save the changes have adjusted.


- Gmail automatically log back in, skip to step 3

STEP 3: Setting the Undo Send
After a successful Gmail login, you return to the Gmail Settings window, in the General - general settings you scroll down looking to Undo Send feature (7). Here, you have the choice of 5, 10, 20 and 30 seconds to regain sent emails in gmail. the time in, you will not be able to retrieve any more mail in gmail. Selection, and scroll down to click the Save Changes to save the changes.


After installation is complete, you proceed to check email send Undo Send feature, When sending to other mail you will receive notice as below: => choose Undo (8) to retrieve email just sent.


Notification has regained just sent an email in gmail when users perform cancel sending, usually this process takes place quite quickly.


Thus, we have guidelines for how to change your settings to retrieve email sent out, the way you do, you have 30 seconds to cancel the email that you are not satisfied. After a period of 30 seconds Gmail does not allow you to do that, if you want you can remove the content immediately sent emails with Gmail gadget on the Chrome browser.


Thứ Năm, 5 tháng 5, 2016

[Guide] Sort by email in Gmail Labels (Label)

Gmail filter is a tool that helps you search emails in Gmail. Besides Gmail Filters also assist you in arranging an email in Gmail by label. This feature will help you turn into Folders Labels like in Outlook, the e-mail to be sorted into the respective labels according to your defined settings available.

As the habit of many people are using Outlook in Vietnam you can set up each client corresponding to a label instead of each folder as Outlook. And when that email came from customers, and the labels will light up next to the number of emails from clients you have not read it. With this new feature will help you quickly select the email to read in order of priority or quickly know your customers are waiting have returned or not.

Moreover, the Label Gmail you can sort email in Gmail with many more set of conditions: the sender , recipients , subject , Having keywords , containing attachments or not, according to the size and all the time, ... these features will easily sort your Gmail emails in a scientific manner and actively.

Here's how to create a filter (Gmail Fifters) for your Gmail:

Step 1: Configuring email sorting filters in Gmail

To start, you need to define the filtering criteria for the filter. You do this by selecting one or more criteria, manipulation just as you perform an advanced search in Gmail (Advanced Search). From above the search box you click on the small down arrow next to the search button to display blue filter configuration table.

1. Click the down arrow to the right of the search box to open the advanced search box.

2. Select one or more criteria to determine which emails should be filtered.

3. Click Create filter with this search link.


Gmail will filter all emails that meets all the criteria that you have configured filters. The email is filtered to meet "and" the criteria you set. In the above example, Gmail filters all mail sent from "ben@cloudeasel.com" and the word "budget" appears in the title and the word "report" appears anywhere in the mail and mail it to have files attach. When Gmail received a message that meets all four criteria, it will take one or more actions on a message. It's action ....? That's what we're going to set up in the next step:

Step 2: Identify the actions taken to satisfy a criteria above

Click "Create filter with this search." There will be a lot of options so you can set automatic actions for a message in Gmail satisfy the conditions set above.

If just sort emails in Gmail satisfy the above conditions on the label, "Finance", perform configuration as shown below.


Similarly we will have a configuration for the next labels. After configuration is complete. Whenever receiving mail in accordance with the email filter will automatically be rated as established labels. As shown below we can see that there is an email from Ben Brown 2 marked label "Finance":


When you need to change or edit the settings Gmail Filters. You can click on the Configuration -> Settings -> Filters. Here will be the list of filters you have installed, you can edit or delete them here: